Showing posts with label Valentine's Day. Show all posts

Thursday, February 16, 2017

Classroom Valentines

Well,  it's been a while since I've posted.  But, I wanted to share the little classroom Valentine's I made for my son's school this year.  There are a cute little swing top box filled with sour peach gummy hearts.  (Which were delicious, because I had to test them you know, to make sure quality)  This year we made them for not only Kieran's classmates, but all the other specialist teachers and principals and office staff as well!  The morning of Valentine's Day we went to the office and put them in the various faculty mailboxes which he thought was pretty exciting.


SuppliesStamps: A Muse dino clear set and with love set and JustRite DIY Curlz monogram set and Times New Roman font setInk: A Muse cherry and VersaFine onyx blackPaper: A Muse cherry heartbreaker, sugar, and cherry chevron cardstockMisc.:  A Muse onyx baker's twine, A Muse heart twinkle stickers, foam mounting tape, Spica jet black glitter pen, Lifestyle Crafts nesting hearts die set, and Mama Elephant Union Square Creative Cuts die set (clear plastic bags and washi tape on the inside to hold the candy)

Monday, February 15, 2016

Valentine's Day No.17

Last but not least, here's the card I gave to my husband this year.  I've had it done for a while, but of course I couldn't blog about it since he reads this and it would kind of ruin the surprise.  But, he opened it up already so now it's fair game.  (haha, see what I did there?)  I used a new stamp for this card.  I saw it at Impress last year and resisted but broke down and got it this year.  Nathan and I love playing board games together, so it seemed very fitting.  I love that this tic tac toe happened to be perfectly sized for the little set of Martha Stewart heart stamps I already have!  The sentiment is on the side of the grid stamp.  Love those two in one stamps!  For the free space in the middle, I stamped it once on the cream piece with the grid and then once again on the die cut heart, which I then popped up with a little foam mounting tape.  I also rather intentionally made it so the game is a tie.  Both types of heats won.  The inside says, "Happy Valentine's Day".


Supplies
Stamps:  Impress Rubber Stamps tic tac toe combo, Martha Stewart Crafts wood hearts stamp set, and A Muse with love set
Ink:  A Muse french roast, apple, and blush
Paper:  A Muse vanilla, blush, apple, and kraft cardstock
Misc.: A Muse with love and hearts trio die sets, foam mounting tape, A Muse french roast pearl stickers, Lifestyle Crafts nesting lace hearts die set, and Spellbinders nesting squares die set

Thursday, February 11, 2016

Classroom Valentines

We did a non-food treat this year for Kieran's class valentines.  I found some cute kid self inking dinosaur stamps on Amazon.  His class had already decided to name themselves "The Dinosaurs" earlier this year, so it seemed appropriate.  The packaging definitely looks similar to last year's.  But, since they are 4 year olds, I'm not all that worried about it.  To make them, I die cut the little bags out.  This was the part Kieran helped the most with.  He LOVES to work the die cutter.  I also had him die cut the little polka dot tags.  Then, I stamped the dinosaur with extra heart on each of the tags and the sentiment near the bottom of the bags.  Getting the holes lined up between both side of the bag and the tag was really tricky once they were assembled.  So, after trying that once, I did it a little differently for the rest of them.  Before folding and assembling the bag, I lined up both sides of it and the polka dot tag where they would all be once assembled.  Then, I taped them together with a little Washi tape.  Once held together, it was MUCH easier to do the hole punch with my Crop-A-Dile.  After removing the Washi tape, I assembled the bags, added the favors for the kids, and tied them up with the baker's cording!  Ta-Da!  (Oh, and the back of the tags has a little stamp that says "From Kieran".  I stamped that upside down, so that when you flip it up to read it, the words are going the right way.)


Supplies
Stamps: A Muse dino clear set and JustRite DIY Curlz monogram set and Times New Roman font set
Ink: A Muse Berry
Paper: A Muse bubblegum heartbreaker and popsicle pink tiny dots cardstock
Misc.: A Muse lunch sack and card catalogue tag, We R Memory Keepers Crop-A-Dile, double sided tape, Washi tape, and A Muse blush baker's cording

Wednesday, February 10, 2016

Valentine's Day No. 16

I must say, this one turned out to one of my very favorites this year.  It just really spoke to me.  I started with a die that cuts out three vertical half hearts.  I centered it on the watercolor paper layer and ran it through my die cutter.  Then, to make the other half of the hearts, I flipped the paper over, lined it up, and ran it through again.  Once both sides of the hearts were die cut, I placed it on my score board and used a bone folder to score lines down the center of each heart.  After that, I took the brush end of a VeraMark pen to freehand a little outline on each heart and gold emboss it.  Next  up, was the watercolors.  I used a pink for the hearts and transparent gold for the background.  The paper was quite saturated with water and thus quite distorted, so again I placed it under something flat and heavy overnight.  The next day, I pulled it back out and added foam mounting tape, sequins, gold twine and the card base.  I am slightly regretting that I didn't also outline the entire watercolor  later in gold embossing as well.  But, maybe that's something for next time.  The inside says, "Happy Valentine's Day".

Supplies
Stamps: Savvy Stamps Happy Valentine's Day (inside)
Ink: A Muse Watermelon (inside) and VersaMark pen
Paper: A Muse watermelon and  Strathmore Bristol board 300 series smooth/vellum
Misc.: May Arts metallic gold twine, foam mounting tape, Ranger superfine detail gold embossing powder. A Muse pearl sequins, heat tool, Martha Stewart Crafts score board and bone folder, Memory Box Half a Heart die, and Nicholson's peerless watercolors and transparent metallic gold

Tuesday, February 9, 2016

Valentine's Card No. 15

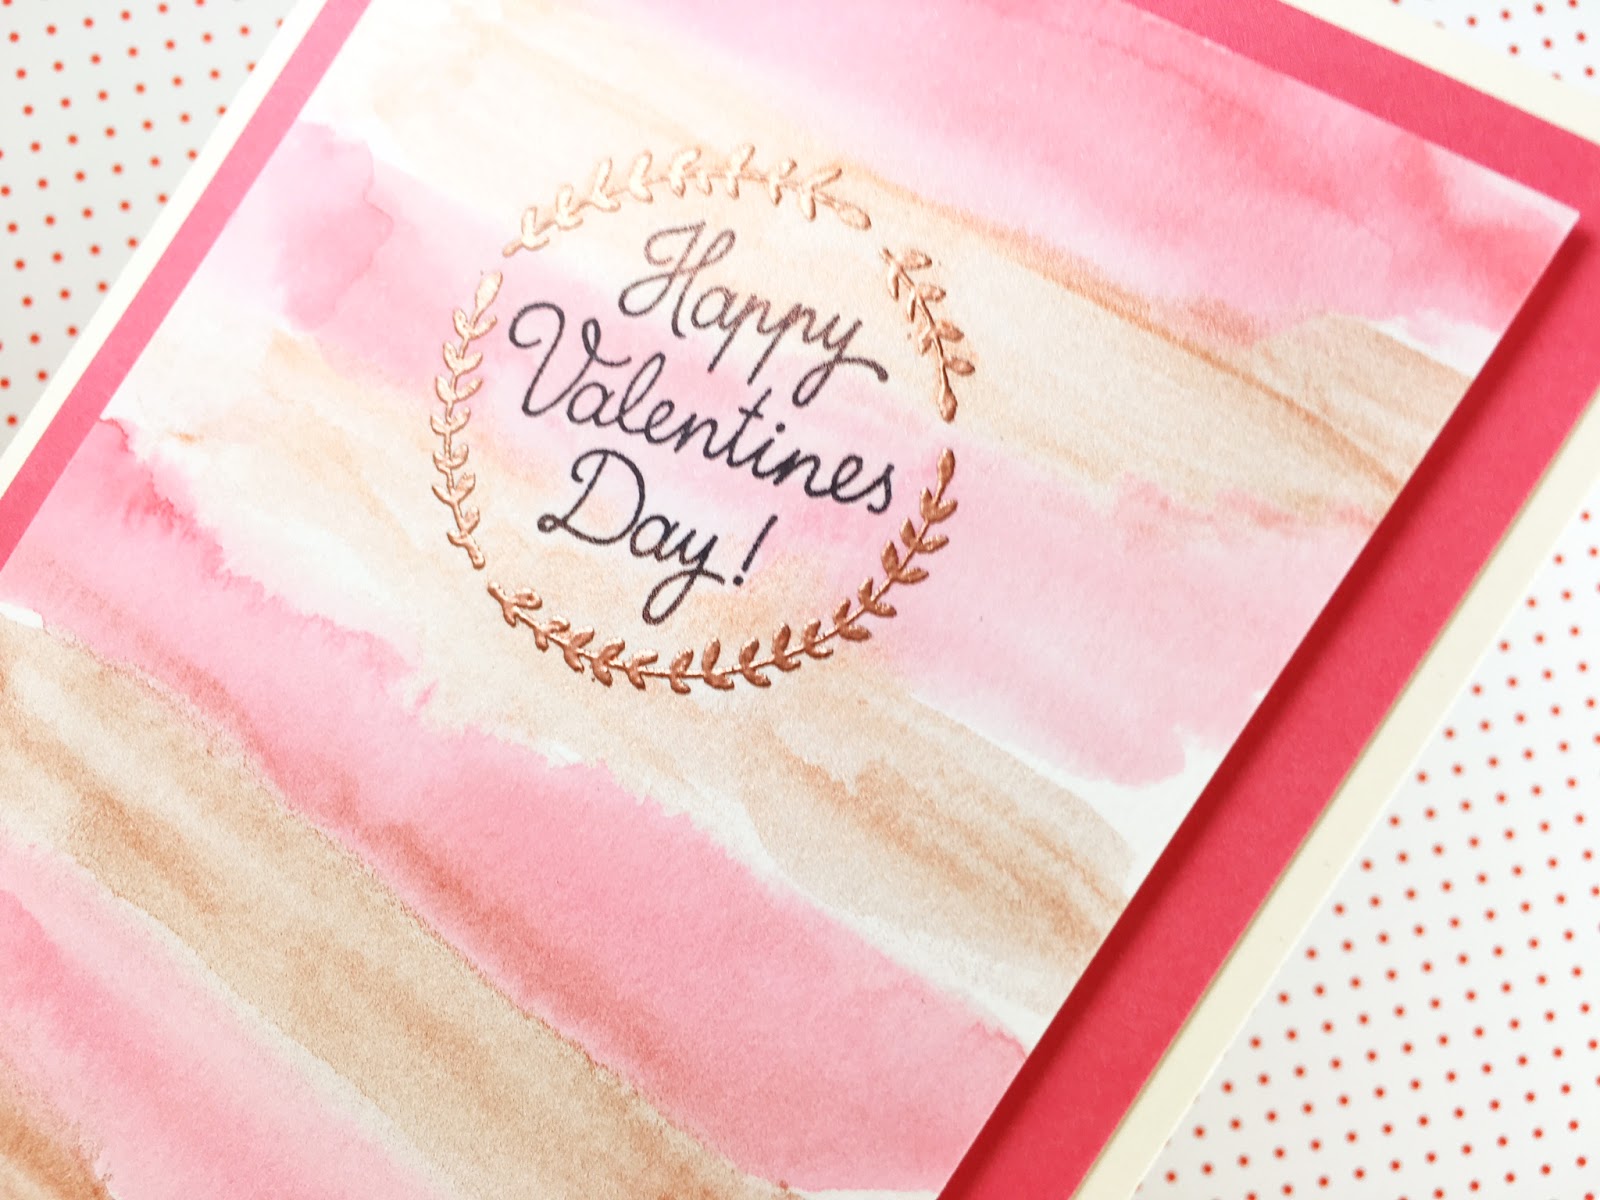
Only a few more left to show you.  Copper is really having a moment right now in crafting.  I got some great copper embossing powder and transparent watercolor to try and I think they look great together!  First, I stamped the wreath in VersaMark, embossed it in copper, and stamped the sentiment in the middle with an archival in that wouldn't bleed with watercolors over it.  Then, I just made broad freehanded stripes in pink and copper.  Since I covered the entire piece of paper in watercolor, it was very distorted after it dried.  So, to correct that a little, I left it flat under some heavy books overnight.  Didn't solve it completely, but helped a lot.  To put the card all together, I just added a pink later on the ivory cardstock and popped the watercolor layer up with some foam mounting tape.  I used a lot more mounting tape than I would have on a regular piece of non-watercolor distorted cardstock.  The additional tape seems to help flatten it out too.  The inside says, "Made with Love".
Supplies
Stamps: A Muse with love set and made with love (inside)
Ink: Ranger Archival jet black, VersaMark, and A Muse grapefruit (inside)
Paper: A Muse vanilla and grapefruit and Strathmore Bristol board 300 series smooth/vellum
Misc.: Ranger superfine detail copper embossing powder, heat tool, foam mounting tape, and Nicholson's peerless watercolors and transparent metallic copper

Monday, February 8, 2016

Valentine's Card No. 14

14?  I can't believe I've made that many this year!  That's more designs than I managed to complete for Christmas!  Crazy!  Anyways, being Norwegian and Danish, I *really* can't help myself about anything remotely Scandinavian.  This little viking was no exception!  I just HAD to get it (especially since there were matching dies!)  I stamped him and the hearts, die cut them, and colored them with Copics.  I tried to give the viking a little shading here and there.  I added some sparkle over the hearts.  Then, I adhered them to the pinstripe heart and trimmed off the tip of the heart to it looks as though he's actually standing on the ground, not floating about in mid air.  The pale pink layer with the little hearts on it is actually made with a stencil and embossing paste!  I love the dimensional look that gives.  But, it did make it a little more challenging when I went to attach the viking heart to it.  Typically, I would put the foam tape on the heart and then stick it on.  But, the embossing paste hearts would have made it all uneven if there had been foam tape on top of some of them and not all.  So, I carefully put the foam tape on the pink layer in-between the embossed hearts.  It was tricky, and I had to keep laying the heart down to double check that I hadn't put them in spots that wouldn't be covered by the heart.  But it worked well in the end.  The inside says, "Will you be my Valentine?"


Supplies
Stamps: Avery Elle Viking clear stamps and Impress Rubber Stamps Will you be my Valentine? (inside)
Ink: A Muse black dye and apple (inside)
Paper: A Muse sugar, grapefruit petite pinstripe, apple, and blush cardstock
Misc.: foam mounting tape, Copic markers, Wink of Stella clear glitter brush pen, Avery Elle viking elements die set, Lifestyle Crafts nesting hearts die set, Simon Says Stamp falling hearts stencil, Ranger white opaque matte texture paste

Sunday, February 7, 2016

Valentine's Card No. 13

I love making things sparkle.  I love it even more when I can make them sparkle without the mess of conventional glitter!  It just gets EVERYWHERE.  I held off getting into conventional glitter for a long time.  I did a lot of Stickles glitter glue instead or various types of glitter pens.  I still use these for adding sparkles in smaller areas.  Eventually, I had to give in and get real glitter.  However, there are some glittery embossing powders out there!  They aren't all created equal.  I tried a green Christmasy one years ago that was really practically pointless.  It barely had any sparkle to it and the little bit it did have would just brush off!  But, the diamond embossing powder from A Muse really has a lot of sparkle to it and they stay put!  I'm not sure I would have thought to use it this way without reading about a technique with it here.  This brilliant lady covered the entire image with VersaMark and then the embossing powder.  I love it!  I think it really worked well on this heart doily.  And once you use the heat tool to activate the embossing powder, it doesn't flake off!  Crazy!  The inside says "happy valentine's day".

Supplies
Stamps: A Muse my aim is true set and Savvy Stamps happy valentine's day
Ink: A Muse grapefruit and VersaMark
Paper: A Muse vanilla, grapefruit, blush, and kraft cardstock
Misc.: A Muse tag bundle die set, foam mounting tape, A Muse diamond embossing powder, heat tool, and Lifestyle Crafts label nesting die set, doily heart, and cupid

Saturday, February 6, 2016

Valentine's Card No. 12

Here's my attempt to not make a Valentine's card with pink.  Feels so strange!  The heart shape made of heart cut outs is all one die, so it's easy to do.  It also then gives you a BUNCH of little hearts that could be used for other things.  For the glittered paper underneath it, I used my Xyron to make an entire piece of black cardstock sticky and then covered it with black glitter.  I chose though, a dark grey for the card layer.  It felt like if it was all just black, white, and red that it was too harsh and stark.  Using a grey seemed to soften it up a bit.  The inside says "Happy Valentine's Day".

Supplies
Stamps: A Muse with love set (inside)
Ink: VersaFine onyx black (inside)
Paper: A Muse cherry, cherry petite pinstripe, onyx, and slate cardstock 
Misc.:  A Muse cherry satin ribbon, foam mounting tape, Lifestyle Crafts heart insert die, A Muse onyx glitter, and Xyron 5" create-a-sticker

Thursday, February 4, 2016

Valentine's Card No. 11

I thought I was all done with Valentine's for this year, but then I made some more!  Here's a shaker card.  I love this little polaroid frame die.  I pulled out an old stamp set for the camera and sentiment. The inside says "happy valentine's day".

Supplies
Stamps: A Muse vintage clear set and sweet love set and Savvy Stamps happy valentine's day
Ink: A Muse apple
Paper: A Muse grapefruit, sugar, grapefruit petite pinstripe, blush and crystal clear cardstock
Misc.: A Muse photo frame 1 die, foam mounting tape, A Muse peppermint baker's twine, A Muse sweetheart sequins, A Muse tag bundle die set

Monday, February 1, 2016

Valentine's Card No. 10

This card was much more about die cuts than stamps.  I cut out the pale pink heart first, then cut out the word love from it, slightly off center.  The banner behind the heart is actually two of the same die attached in the middle to make it long enough.  Then there's just a lot of foam mounting tape between the layers.  I did make the white layer wood grain with a large background stamp.  Normally, that stamp is used with the grain being vertical.  But, with the horizontal banner, it really seemed to work better to have the grain be horizontal as well.  I also used a glitter pen inside the love die cut to give it a little sparkle.  The inside says "Happy Valentine's Day".

Supplies
Stamps: A Muse woodgrain background, Impress Rubber Stamps be mine, and Savvy Stamps happy valentine's day (inside)
Ink: A Muse grapefruit
Paper: A Muse shell, grapefruit, kraft, and sugar cardstock
Misc.: foam mounting tape, A Muse sugar brads, A Muse love and scallop heart die sets, Lifestyle Crafts banner die, Wink of Stella clear brush glitter pen

Sunday, January 31, 2016

Valentine's Card No. 9

This card sat on my craft table in various stages of creation for about 4 days.  I just kept getting interrupted!  I enjoyed the result though once I finally did get around to completing it.  First, I embossed the tree stamp with a satin pearl embossing powder.  Then, I stamped the tree on some ivory cardstock in a brown dye ink.  The dye inks work best I think for coloring with Copics, the ink doesn't bleed.  Next, I stamped the two squirrels in the heart opening of the tree.  I colored the squirrels and leaves, doing my best to add a little shading and blending to the squirrels.  I also colored a freehand pink ground for them to stand on within the heart as well.  Then I used detail scissors to cut out the heart and leaves and adhered them over the embossed tree.  I added the little die cut heart for the two squirrels to hold and gave it a little sparkle in the middle with a glitter pen.  For the little sentiment banner, I stamped the words and then also little acorns on each side.  I also stamped the acorns on ivory cardstock, cut them out, and adhered them to the banner over the acorns there.  I experimented with putting chocolate pearl stickers on the acorns to give them a texture, but it was just too much and seemed to look better plain.  I added some ribbon and a couple layers behind tree layer.  The inside says, "Happy Valentine's Day".

Supplies
Stamps: A Muse squirrels, Nuts about you, You + Me set, and Friends Fur-Ever set and Savvy Stamps Happy Valentine's Day (inside)
Ink: Memento rich cocoa, VersaMark, and A Muse cocoa
Paper: A Muse vanilla, blush, and cocoa cardstock
Misc.: A Muse 7/8" vanilla twill ribbon, foam mounting tape, Lifestyle Crafts banner die, Wink of Stella clear glitter brush pen, detail scissors, Copic markers, A Muse satin pearl embossing powder and A Muse with love die set

Wednesday, January 27, 2016

Valentine's Card No. 8

I'm back to my favorite Valentine's color scheme, pale pink, ivory, kraft and platinum.  For this card, I die cut the little mini Valentine and did a script background stamp for it's pink insert.  This particular platinum ink is the Encore! metallic one.  It's intentionally a very slow drying ink.  The idea being it can be used on a lot of different media and works for blending techniques.  But, it does mean it smudges SO SO SO easily!  I've taken to stamping the things I need with it and letting them dry for at least 24 hours and maybe giving them a quick heat set as well.  It's a lot of effort, but it's just the perfect platinum color.  The little pink postage stamp shape is also edged with the same ink using a sponge dauber.  I did a heart background stamp on the ivory layer in a pale pink and added the sentiment.  The inside says "happy valentine's day".

Supplies
Stamps: A Muse sweetheart and script backgrounds and love is in the air set
Ink: Encore! metallic champagne and A Muse shell and french roast
Paper: A Muse vanilla, kraft, and shell cardstock
Misc.: foam mounting tape, sponge dauber, Lifestyle Crafts mini valentine and invitation die sets

Tuesday, January 26, 2016

Valentine's Day No. 7

The heart wreath on this card is another of my oldest Valentine's Day stamps.  I think I got it at the same time as the swirl tree from this card.  Here, I stamped it in an archival ink and did a pale pink watercolor over it with a large brush.  Then with a much smaller brush, I used the transparent gold watercolor and tried to apply it to somewhat match up with the actual twigs of the wreath.  I added a little kraft colored scalloped edging, some foam mounting tape, and gold twine. The inside says "happy valentine's day".

Supplies
Stamps: Memory Box branch heart and A Muse love is in the air set
Ink: Ranger sepia archival ink
Paper: A Muse shell and kraft cardstock and Strathmore Bristol board 300 series smooth/vellum
Misc.: May Arts metallic gold twine, foam mounting tape, A Muse medium scallop border die, Nicholson's peerless watercolors and transparent metallic gold, and 9mm and 15mm Yasutomo Niji Waterbrushs

Monday, January 25, 2016

Valentine's Card No. 6

Here's to clean and simple cards.  For this one, I placed layers of washi tape on some white cardstock and then die cut a heart out of it.  I also die cut a scalloped heart to have behind the washi striped heart.  Then, I popped it up with a little mounting tape.  (I'm pretty sure I can't actually make a card without mounting tape.) Rounded the corners at the bottom and added a little Baker's twine and a sentiment and done!  The inside says, " Happy Valentine's Day".

Supplies
Stamps: Hero Arts From the Heart and Savvy Stamps Happy Valentine's Day (inside)
Ink: A Muse cherry
Paper: A Muse blush and sugar cardstock
Misc.: Lifestyle Crafts hearts and scalloped hearts die sets, foam mounting tape, A Muse peppermint baker's twine, A Muse washi tapes, and We R Memory Keepers Corner Chomper

Sunday, January 24, 2016

Valentine's Card No. 5

My husband works at Boeing.  His first word was "plane".  We do a lot of airplane themed things in our lives.  Kieran had a great many baby items with planes on them.  There might be a Lego 787 model atop one of our bookcases.  You get the idea.  So, I use this little airplane with heart contrail stamp often for Valentine's day.  Here, I first used an embossing folder on the yellow to make a sun like background.  Then, I stamped the plane.  I did liquid appliqué over the contrail.  Once heated, it puffs up like clouds (or snow).  It's a useful little embellishment product.    I stamped the plane a second time on a scrap piece of cardstock, colored it, cut it out with detail scissors, and applied it directly over the same image stamped on the yellow.  I die cut the clouds out of pink gingham.  I was going for an overall Valentine's sort of color theme, but I was also thinking of a sunset or sunrise with the pink clouds.  I used mounting tape to pop the clouds up for dimension and then added the sentiment and little jewel stickers.  The inside says, "happy valentine's day".

Supplies
Stamps: A Muse love is in the air and sky writer and Savvy Stamps happy valentine's day (inside)
Ink: A Muse black dye and VersaFine black onyx
Paper: A Muse bubblegum petite gingham, blush, sugar, and jasmine cardstock
Misc.: Memory Box blossom jewel stickers, Liquid Appliqué, heat tool, foam mounting tape, Copic markers, Lifestyle Crafts celebrate embossing folder set, detail scissors, and A Muse landscape die set

Thursday, January 21, 2016

Valentine's Card No. 4

Now for a card that's a little more kid oriented.  Though to be honest, I love space stuff too (I could literally go watch Star Trek at any moment.)  For this, I stamped the star background first.  Then I stamped the rocket ship and ringed planet in just the right spot using my stamp positioner.  (Another word that autocorrect doesn't like).   The flame from the rocket engine is a separate image, so the positioner was VERY helpful to get things lined up just so.  I wanted to make sure the flame actually looks connected to the rocket.  I also stamped them onto a piece of plain white cardstock.  These are the ones that I colored with Copic markers.  Then, I cut these out carefully with detail scissors and adhered them directly over their counterparts on the pinstripe paper.  This lets you have a colored image on patterned paper without the image having the pattern as well.  Stamping it on both types of paper makes sure you don't loose any of the black outline of the image when you cut it out.  Where the flame is, I used a glue pen to add some pink glitter.  And lastly, added the sentiment and some more layers with mounting tape.  The inside says, "happy valentine's day".

Supplies
Stamps: A Muse starry night background, greetings earthling set, and love is in the air set (inside)
Ink: A Muse seattle and black dye and VersaFine black onyx
Paper: A Muse bubblegum petite gingham, apple, seattle petite pinstripe, and sugar cardstock
Misc.: A Muse bubblegum glitter, Sakura Quickie glue pen, A Muse heart twinkle stickers, foam mounting tape, stamp positioner, detail scissors, Copic markers

Wednesday, January 20, 2016

Valentine's Card No. 3

The flourish seen through the hearts windows on this card is actually one long image.  I liked how the center of the flourish makes a stylized heart as well.  I stamped and embossed it three times on three different shades of pink and then lined them up for the background of the windows in a color gradient order.  Die cutting the hearts so they were properly lined up was tricky, but with the help of a centering ruler, they are pretty much where they should be!  The inside says "happy valentine's day".

Supplies
Stamps: A Muse made with love, love is in the air set (inside), and ornate elements set
Ink: A Muse apple and VersaMark
Paper: A Muse sugar, kraft, grapefruit, apple, and blush cardstock
Misc.: A Muse heart trio die set, foam mounting tape, A Muse white embossing powder, centering ruler

Tuesday, January 19, 2016

Valentine's Card No. 2

This heart swirl tree was one of the first Valentine's day stamps I got.  I still love it!  This time, I used watercolors on it.  I made sure to stamp it with archival ink that wouldn't bleed.  I used the same red, just with different levels of water to change the shade.  Over the branches and swirls I used a metallic gold transparent watercolor for a nice shimmer.  The inside says "Happy Valentine's Day".

Supplies
Stamps: Memory Box Lovey dove tree, A Muse love conquers all set, and Savvy Stamps Happy Valentine's Day (inside)
Ink: VersaFine vintage sepia and Ranger sepia Archival Ink
Paper: A Muse vanilla, latte woodgrain, grapefruit, and cocoa yardstick and Strathmore Bristol board 300 series smooth/vellum
Misc.: foam mounting tape, Lifestyle Crafts banner die, A Muse sweetheart sequins mix, Nicholson's peerless watercolors and transparent gold metallic, blossom Waste Not Ribbon 

Monday, January 18, 2016

Valentine's Card No. 1

I got all my Christmas stuff put away.  Decorations, special Christmas dishes, all of it.  It's a huge amount of stuff.  I don't think I could admit just how much.  Last to be put away was my Christmas craft stuff.  And then out comes Valentine's day stuff!   I have definitely been trending towards pink and cream for the last couple of years when it comes to this holiday.  And this card is no exception.  First, I stamped the trees and birds on cream cardstock. (side note: my computer tries to autocorrect cardstock to yardstick EVERY. SINGLE. TIME.)  The sparkly hill for the trees is actually made of A Muse's clear glitter paper.  It's so smooth you can color on it!  Then, I used a landscape stitched die to cut the hill out, adhered it to the cream paper and die cut the tag shape out with the hole thing.  Just add some ribbon, mounting tape, and a little die cut sentiment banner and done!  The inside says, "happy valentine's day".

Supplies
Stamps: A Muse possibility of miracles set, heart trio, and love is for the birds and Savvy Stamps happy valentine's day (inside)
Ink: A Muse french roast, latte, and blush
Paper: A Muse vanilla and blush cardstock and everything's rosy 6x6" paper and glitter paper
Misc.: foam mounting tape, A Muse 7/8" vanilla twill ribbon, A Muse tag bundle die set, A Muse landscape die set, Lifestyle Crafts banner die, Copic markers, and A Muse blush twine

Saturday, February 21, 2015

Valentine's No. 14

Last but certainly not least, here is the card I made for my truck loving little boy this year.  I outlined the windows of all the buildings with an extra pale Copic markers to give the impression of glass.  The road is a narrow little border stamp on gray paper that I white embossed.  I popped up the cut out ambulance, yes cut out no dies for this one, with foam mounting tape and added some red stickles to make the cross and siren have a little sparkle.  The inside says "happy valentine's day".  I have to say, I hit it out of the park on this one, he thought it was super cool.

Supplies
Stamps: A Muse loads of fun, essential sentiments (inside), clear borders, and love is in the air 
Ink: A Muse black dye and grapefruit, VersaFine black onyx, and VersaMark
Paper: A Muse seattle petite pinstripe, bubblegum petite gingham, seattle, and sugar cardstock
Misc.: foam mounting tape, A Muse heart jewel stickers, white embossing powder, Copic markers