Showing posts with label Halloween. Show all posts

Tuesday, October 31, 2017

Halloween No. 4

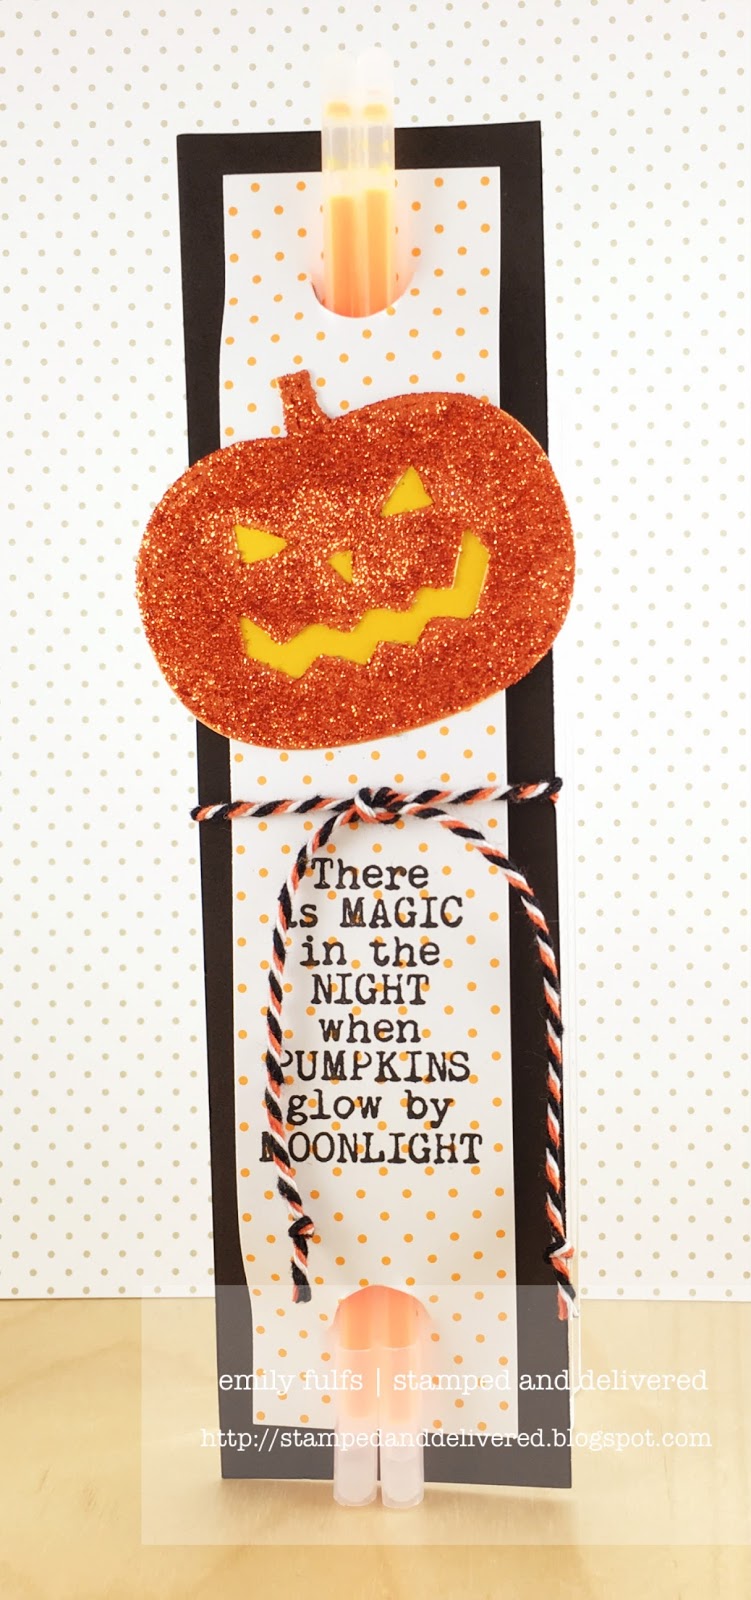
Happy Halloween!!  My little kiddo was bonkers excited this morning.  He's a super hero (a last minute change from being an astronaut, again.)  I've got this one last Halloween project to share with you today.  It's a cute little Jack o' Lantern treat bag!


Supplies
Stamps: A Muse hello pumpkin
Ink: A Muse orange
Paper: A Muse grape, orange, and papaya cardstock
Misc.: A Muse toffee twine, A Muse small wooden clothespin, A Muse halloween washi tape assortment, A Muse onyx glitter, Sakura Quickie glue pen, A Muse clear embossing powder, A Muse gift tag trio and hello pumpkin die sets

Monday, October 30, 2017

Halloween No. 3

Only one more day until Halloween!  Or so my six year old kept informing me at breakfast this morning.    He is most definitely ready for it!   So here's another Halloween card for you.  It's pretty straight forward, but I found that using the washi tape at the bottom of the card didn't stand out when I put it directly on the onyx petite dot cardstock.  So, I put the washi tape on a scrap of white cardstock first, and then put the whole thing onto the card base.


Supplies
Paper: A Muse onyx petite dot, melon reverse dot, blackberry, orange, and papaya, and sage cardstock

Tuesday, October 10, 2017

Halloween No. 2

October seems to be here!  Last night it was down to 40 degrees!  LOVE IT!  I love cold weather, and while we've had *some* rain, so far there hasn't been nearly as much as there usually is here in the PNW.  So lots of sunny crips fall days.  Perfect!

Today, I've got another cute Halloween card for you!  Once again, I used a Copic marker to make the eyes on the bats orange rather than just the white of the paper they were stamped on.  That little circle with the inverted scallops is actually the negative die cut from one of A Muse Studio's stitched windows!  The large stitched rectangle is also a bit tricky.  It's the stitched rectangle from the Tag Bundle die set, but it was a little too big from the sentiment, so I shortened it up by running it through again and trimming off the parts I didn't need.  The only catch is you have to make sure the stitch marks are all lined up!


Supplies
Stamps: A Muse Spooky Trick or Treat
Ink: A Muse onyx
Paper: A Muse orange, sugar, and onyx petite dot cardstock
Misc.: A Muse onyx baker's twine, foam mounting tape, A Muse clear embossing powder, A Muse tag bundle, stitched windows, and spooky trick or treat die set, Copic markers, and A Muse Halloween washi tape assortment
SaveSave

Tuesday, October 3, 2017

Halloween No. 1

Fall is here!!  It's October!  I've got my Halloween decorations up and my kid has even planned to be the same thing as last year! (Astronaut!)  That makes me so on top of it.  Nevermind all the blog entries from this summer I still haven't shared yet.  So moving along, look at this cute Halloween card!  It's a small 4bar size card that goes nicely with the little die cut scalloped frame.  I added orange Copic marker to make it's eyes orange instead of white, and I think that really ties it together.


Supplies
Stamps: A Muse Hello Pumpkin and Spooky Trick or Treat
Ink: A Muse onyx and grass and VersaFine onyx black
Paper: A Muse onyx petite dot, orange chevron, sugar, grass petite gingham, and blackberry
Misc.: A Muse Spooky Trick or Treat, Come if You Dare, and Gift Card Envelope die sets, A Muse clear embossing powder, Tim Holtz Tiny Attacher, foam mounting tape, and Copic markers
SaveSave

Wednesday, August 23, 2017

a•muse | studio September Sneak Peak Day 2

Hello!  Welcome to Day 2 of Sneak peaks!  Today, I'm showing you another great way to use the new "Hello Pumpkin" set, this time with a Halloween theme rather than a Fall/Thanksgiving one.  Turned out pretty cute!

Check out the A Muse Studio Blog today for another giveaway and more sneak peaks!


Supplies
Stamps: A Muse Hello Pumpkin
Ink: A Muse orange, papaya, and sage and VersaMark
Paper: A Muse grape, sage, orange, and papaya cardstock and Strathmore Bristol Board
Misc.: A Muse clear  and silver embossing powder, A Muse orange glitter, A Muse silver elastic cording, A Muse Halloween washi tape assortment, super stick red double sided tape, foam mounting tape, Nicholson's Peerless watercolors

Tuesday, November 1, 2016

Halloween No. 5

I hope everyone out there had a safe and super fun Halloween last night!  I know we did!  Here is my very last, and probably my very favorite, Halloween card this year!  I made it for my mom who really loves a sort of French inspired/vintage/clown type of Halloween theme.  I had to use my absolute crafting nemesis.  Black embossing powder.  I just have the worst time with it, but in this case, I really needed it for just the right look!  Using my MISTI really helped since it was with a big background stamp.  The inside says "Happy Halloween"


Supplies
Stamps: A Muse harlequin background, treat expppurt set and happy halloween (inside)
Ink: VersaFine onyx black and VersaMark
Paper: A Muse orange, orange petite dot, sleepy hallow, and gold star cardstock
Misc.: Lifestyle Crafts postage stamp die, toothpick, A Muse onyx baker's twine, A Muse treat exppppurt, stitched circles, and rosette die sets, A Muse crystal clear glaze, foam mounting tape, A Muse onyx embossing powder, and MISTI

(And here's a shot of my little astronaut and his ground control engineer)

Monday, October 31, 2016

Halloween No. 4

Happy Halloween everyone!  I wanted to make favors for Kieran's classroom party this year.  I had plenty of extra glow sticks from this project.  And then I had TONS of grey ghosts from making this project! So this is what I came up with! I think they turned out pretty cute.  And what kid doesn't like glow sticks?  I know mine was thrilled with it.


Supplies
Stamps: A Muse happy haunting
Ink: VersaFine onyx black
Paper: A Muse orange, orange chevron, onyx, and slate cardstock and orange crush asterix notecard
Misc.: Making Memories slot punch tool, A Muse halloween baker's twine, foam mounting tape, Lifestyle Craft banner die, and A Muse ghost tag die

(here's our family of pumpkins this year!  Kieran wanted his to be Cluny the Scourge from Redwall!)

Sunday, October 30, 2016

Halloween No. 3

At our house today we got our pumpkins carved!  We like to make four jack o lanterns.  One for me, one for my husband, one for my son, and one for the dog.  I'll post pictures later on of them all lit up on our porch.  This year, Kieran actually scraped his own pumpkin out!  Progress!  A little ways from carving it himself, but you know, baby steps.

This card just makes me smile.  I love the happy dancing skeletons and the spray ink turned out really well!  I didn't have a steel die or an electronic machine to cut out the skeletons, so I had to do them by hand.  I attached the banner pennants to the card front first and then glue the twine over them with a glue pen.  The inside says "Happy Halloween"


Supplies
Stamps: A Muse kick up your heels
Ink: VersaMark
Paper: A Muse orange, onyx petite gingham, sugar, slate, and sleepy hollow cardstock
Misc.: foam mounting tape, A Muse onyx baker's twine, A Muse tall alphabet, mini banners, and tag bundle die sets, A Muse white embossing powder, A Muse onyx, orange, and marshmallow Splash! spray inks

(A little grossed out, but still doing it anyways!  The drill attachment came from Williams-Sonoma is for cleaning out the pumpkins is AMAZING)

Saturday, October 29, 2016

Halloween No. 2

This is a BIG one!  I love love love this frame from Lifestyle Crafts!  (and very much glad that though they were Quickutz, then Lifestyle Crafts, then We R Memory Keepers, they are now owned by American Crafts and at least in that way they still exist!)  The frame is pretty large though, so the usual A2 size card isn't big enough.  For this, I used an entire 8.5 x 11" piece of paper and just scored it in half.  I made the frame sparkly with black glitter and my Xyron.  I love this witch profile stamp, though sometimes it can be hard to get solid images to be dark enough on the page in certain ink colors.  But, I used my MISTI so that I could stamp the same one over and over till it was saturated enough!  The inside says "Happy Halloween"


Supplies
Stamps: A Muse witchy woman
Ink: A Muse wasabi and VersaFine onyx black (inside)
Paper: A Muse orange petite gingham, orange petite dot, onyx vintage, vanilla, and onyx cardstock
Misc.: A Muse halloween baker's cording, foam mounting tape, A Muse witch woman die, Lifestyle Crafts frame diem A Muse onyx glitter, and Xyron Create-A-Sticker

Friday, October 28, 2016

Halloween No. 1

Happy Friday everyone!  It's been a long week here.  I'm sure looking forward to some wine with dinner tonight after we put Kieran to bed!

Besides the projects I made for my Halloween themed class, I made a few others.  Here's the first.  I REALLY love how the sunset turned out.  I just used sponge daubers and a lot of blending motions!


Supplies
Stamps: A Muse any other night
Ink: A Muse current, pumpkin, squash, saffron and VersaFine onyx black
Paper: A Muse saffron, seattle, slate, onyx, sleepy hollow, and vanilla cardstock
Misc.: A Muse pinking circles, bat trio, spooky fence, and spooky landscape die sets, foam mounting tape, sponge daubers, and A Muse halloween baker's cording

Monday, October 17, 2016

Cauldrons, Cobwebs, and Coffins No. 6

Here's my very last project from the Cauldrons, Cobwebs, and Coffins class!  I really love how this turned out.  The orange glitter on the pumpkin is so beautifully intense, and the yellow cardstock for the Jack o' Lantern face really makes it look like it's glowing!  Which of course goes perfectly with glowsticks!  And, the sentiment is so fitting.  My son thought these were really cool, I think I may need to make some more as Halloween favors for his class!


Supplies
Stamps: A Muse You're Legendary set
Ink: VersaFine onyx black
Paper: A Muse onyx, orange, saffron, and melon reverse dot cardstock 
Misc.: A Muse halloween baker's cording, Making Memories slot punch tool, A Muse jack tag die, A Muse orange glitter, Zyron Create-A-Sticker

Thursday, October 6, 2016

Cauldrons, Cobwebs, and Coffins No. 5

This next project is one of my favorites!  I made a luminaire using a popcorn box!  It turned out SO cute!  I used vellum on the inside of the ghosts to create a little window and sequins for the eyes!


Love how it looks all light up!
Supplies
Stamps: A Muse you're legendary set
Ink: Delicata silvery shimmer
Paper: A Muse slate and orange cardstock and Martha Stewart Crafts vellum
Misc.: A Muse onyx 4mm sequins, A Muse eek, popcorn box, large pinking border, and ghost tag dies

Monday, October 3, 2016

Cauldrons, Cobwebs, and Coffins No. 4

Wow, life has been SO busy lately!  With my son in Kindergarten, I've gotten to go back to work part time!  I am SO lucky to have gotten a job with Froggy Holler Outdoor School!  Assisting an AMAZING lead teacher and hiking in the woods with some super fun kiddos!  It's been tricky figuring out our family life schedule with so many big changes.  But, we are starting to find our groove.   But, I'm a little behind on blogging!

Trying to catch back up, here's the 4th project from my Halloween class waaaaay back in August!  My favorite part of this one was getting to make the lime green sparkly stockings!  I also used a black Wink of Stella glitter pen to make the black stripes a bit sparkly too.  As well as coloring alternating segments of the spiderweb with a clear Wink of Stella.


Supplies
Stamps: A Muse Creep It Real
Ink: VersaFine onyx black
Paper: A Muse sugar, lime, seattle petite pinstripe, seattle, and onyx petite dot cardstock
Misc.: A Muse creep it real die set, A Muse web embossing plate, foam mounting tape, A Muse lime glitter, Sakura Quickie glue pen, and Wink of Stella clear and black glitter pens

Tuesday, September 6, 2016

Cauldrons, Cobwebs, and Coffins No. 3

Today was my little guy's first day of Kindergarten!  Hard to believe we've made it to Elementary School!  Don't get me wrong, I'm not the teary type of nostalgic mom wondering where my baby went.  Just not in my DNA, for example I didn't cry at my wedding.  I'm still amazed at the how fast (and slow) the time as gone by.  But, I'm nothing but proud of my little man, excited to see all that he can do and learn this year, and let's be honest, thrilled about full day school!

Anyways, here's the third project from my August class!  I saw this card on Pinterest and loved it SO much I had to make something similar.  It was just adorable.  My husband saw it and immediately commented that the ghosts look like Pac-Man.


Supplies
Stamps: A Muse Creep it Real set
Ink: A Muse lime
Paper: A Muse sugar, onyx, orange, lime, violeta, and seattle petite dot cardstock
Misc.: A Muse ghost trio and candy wrapper die sets, foam mounting tape, and A Muse onyx and lime pearl stickers


(cause I can't help it, he's just so cute and happy!)
SaveSaveSaveSave